Sunday, December 14, 2014

Brew 1 - Amber Ale is done!

Batch one is brewed and bottled. 


Yesterday, after 2 weeks of conditioning in the bottle, Chris and I opened our first bottle.  Things turned out real well.  It has a little more of a hint of vanilla than I had expected, but over all it's great.  Quite honestly, I'd be very proud to serve this beer to anyone.

Here's the recipe we followed -Ballast Point's American Amber Ale recipe:

Steeping Grains:

0.75 lb Crystal Malt 60L
0.5 lb Caramunich
0.5 lb Carapils

Fermentables:

6 lb Light Dried Malt Extract

Hop Additions:

60 mins - 1 oz Northern Brewer
5 mins - 1 oz Northern Brewer

Yeast:

White Labs California Ale Yeast - WLP001

Being our first try, I'm really impressed with how we were able to create a good tasting, non-skunky, evenly carbonated beer.

Friday, November 28, 2014

Recirculating Wort Chiller Works Awesome

Chris and I fired up our second brew this evening, a Belgian Double.

This was our first chance to try the recirculating chiller, which worked great.  With the rush to get the kettle off of the stove and next to the sink we didn't take a time mark to know how fast it exactly cooled, but it seemed like about 10 minutes to get down to 75F.  We could have finished faster if we'd added salt and ice right at the start of the cool.  Plus doing a little more mixing of the wort to get the hot stuff on to the coils would have helped too.

Regardless, here's the chiller in action and a brief overview:


If you want to make your own version of one of these, here's the parts list (note that I also included the Home Depot sku (except for the pump and power adapter):

Qty - Description - SKU
1 - 20 foot 3/8" ID soft copper tubing - 685768328575
1 - 3/4 inch (OD) vinyl tubing - sku 098268038484
4 - ss clamps - 078575170657
1 - pack of heat shrink tubing - 032076077594
2 - brass connectors 1/2" compression to 1/2" male iron pipe - 042805445914
4 - brass barbs 1/2" barb to 1/2" female iron pipe - 042805446157

And here's how it goes together:

1. Put heat shrink over each of the pump wires, solder each pump wire to the corresponding adapter wire, pull the tubing over the joint, and shrink the tubing over the joint.
2. Attach one compression fitting to each end of the copper pipe.
3. Shape your copper tubing as necessary to fit your kettle.  I tightened the coils a bit and gently bent one end up so that it exited at the same side of the coil as the other. 
3. Cut 3 appropriately sized sections of the vinyl tubing.
4. Attach the 4 metal barbs to the vinyl tubing.  Your return from the copper and the uptake from the ice bath each get one barb.  The line from the pump, in to the copper pipe gets one barb on each end.  Use the ss clamps to ensure you've got a good seal between the vinyl and the barbs.
5. Apply Teflon tape to each of your male threads.
6. Attach the tubing to the pump and copper. 
7. I also chose to mount my pump in a piece of 2x4.  Regardless of what you chose to do, just make sure you consult the pump directions before you mount it anywhere.  And make sure you prime the pump by filling the uptake tube before you turn on the pump.

Batch one bottled

About $9 a beer so far

Batch Two

Recirculating Wort Chiller

Getting in to the brewing game, one of the things that becomes instantly apparent is that quickly cooling your wort in a sanitary manner is one of the most important problems to be solved.

When you look around the internet there seems to be a few ways of accomplishing this:

1. Put your brew kettle in an ice bath  
2. Insert an immersion water chiller in to your kettle and run tap water through it
3. Utilize some sort of counterflow chiller where you pass your wort through an inner copper coil and then have a tube of tap water running in the opposite direction outside it

Looking at these ideas, they all have what seem to be weaknesses that can't be easily mitigated.

From the ice bath perspective, it's a lot of time, physical work, and potential for contamination.   You've got a hot kettle that you need to swirl around in unsanitary water for 15 or so minutes, constantly adding ice.  It's a lot of work, plus takes time.  All of that hot wort is creating impurities for your beer.

The immersion chiller seems to be the best of them all; however, still has the weakness that you need to run tap water through the copper for 15 or so minutes.  Here in San Diego this isn't so palatable.  First, our tap water isn't very cold.  More importantly we're in the middle of a long drought here and likely will be for the next 200 years.  Water is expensive and wasting it by running a tap for 15 minutes is unacceptable (at least to me). 

The counterflow chiller idea looks really cool, but when you think it through, it has the potential to be kind of a disaster.  First, you still suffer from all the water wastage of the immersion chiller.  Next, it's a lot more work to build one of these than an immersion chiller.  Even worse, you're running your sugary wort through the inside of a copper pipe.  A pipe that you have no way to properly clean or even know what's inside it.  Plus you need to have an extra supply of boiling water and a pump to sanitize the inside of the chiller prior to each use.  All in all, the counter flow chiller looks really cool, but seems to have a lot of negatives.

My idea is that we can do this a little smarter and with a lot less water.  Thus, the recirculating copper chiller.

The idea here is to effectively add a pump to an immersion chiller such that we can pump ice cold water through the copper coil.  This will allow us to pump ice water in to our copper.  At first we'll drain the very hot output in to a bucket so that we can save it for the avocado tree (which is always thirsty).  Then as the output gets cooler, we can simply recirculate it through the ice bath, saving a ton of water.

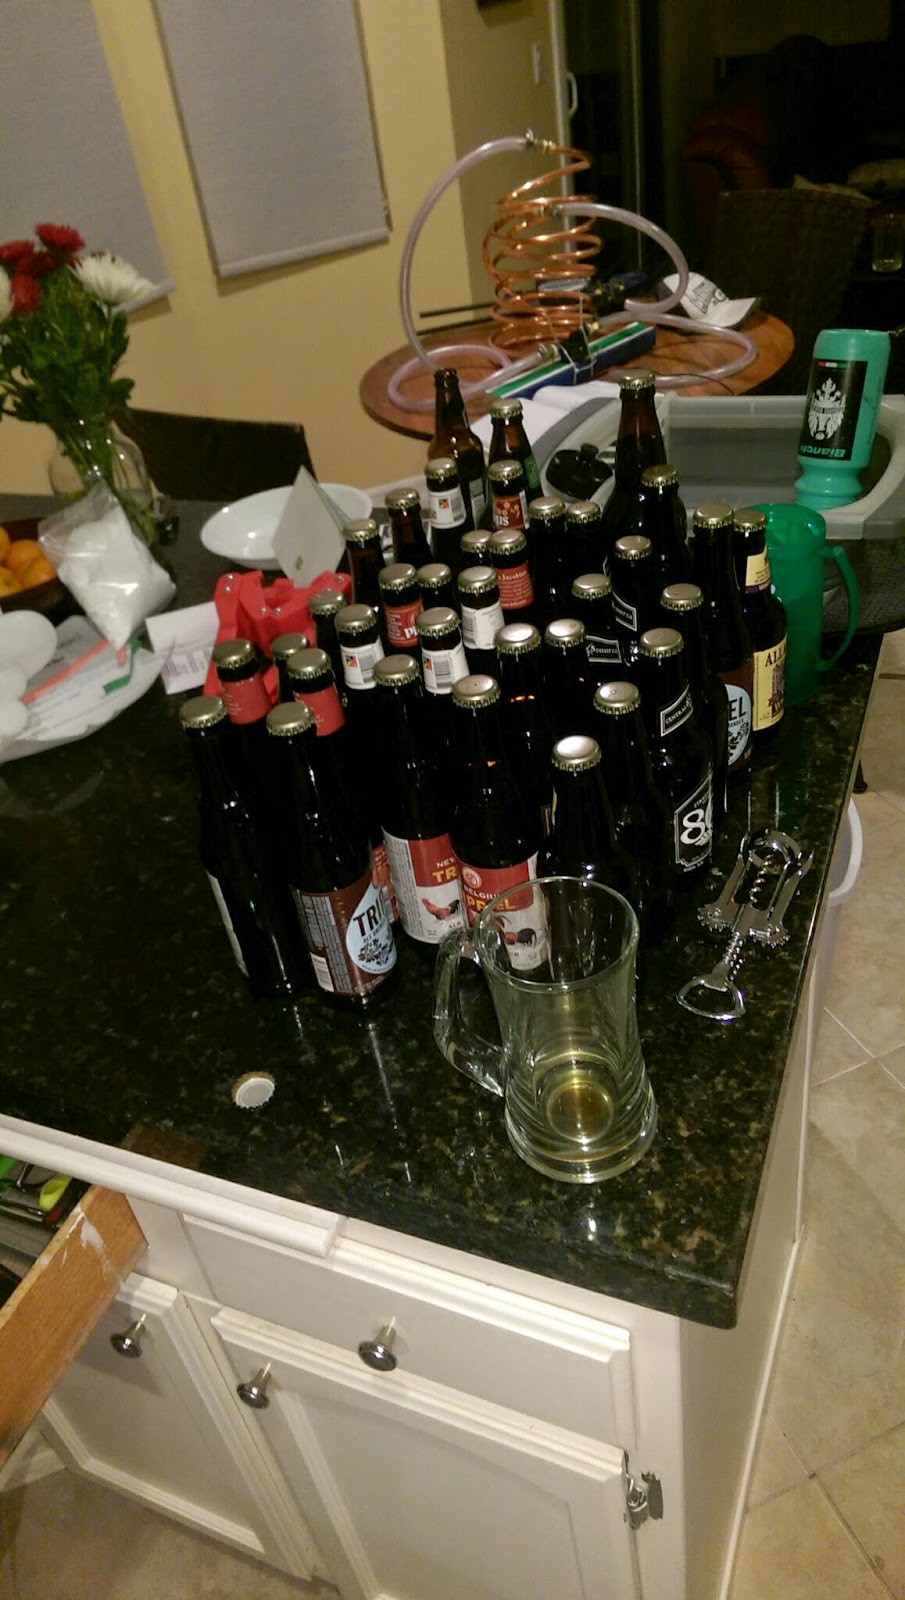
So, I've built this device (pictured below):


The pump that's mounted in the 2x4 will pull water out of a ice bath, in this case the kitchen sink, in to the copper coil, and through the output end back in to the chiller.  The copper will be submerged in the wort 10 minutes prior to the end of the boil so that's sanitary.  Once we want to chill, we simply start pumping our cold water in to the copper.  Note that this device hasn't yet been tested in a brew (we'll be doing that later today).  It has been tested for leaks, pump speed, etc and is looking like it's ready for action.  Once it's been proved out I'll add a video and a parts list so that you can build one of your own.

Brew 1 - Amber Ale

Chris and I consider ourselves to be well accomplished on the demand side of the brewing process.

Rather than taking pot shots at the brewing skills of others, we've decided to take the plunge and start brewing for ourselves.  I can be fairly certain that after going through the pains of this process, I'll never be so critical of the beer of others again.

For our first brew we headed down to the Ballast Point Home Brew Mart and picked up their starter kit #2. If you're getting started in brewing, I'd highly recommend a visit to these guys.  They're very helpful and have lots of great ingredients and equipment on hand.  Our prime purchases being a glass carboy and plastic bottling bucket.  We also got some of the basics like a racking cane, bottling tube, bottle capper, caps, and hydrometer.  Trying to keep it simple for our first brew, we chose to go with an amber ale recipe.

And so we were brewing.  Here's a video of Chris stirring our wort:


 Lessons Learned:

1. Water management is important.  Prior to starting our boil we didn't realize that we should have already boiled and chilled a few gallons of water.  This would come back to bite us when we didn't have the chilled water to top our fermenter up to 5 gallons, or to help with the final cooling of our wort.
2. Create a checklist for brews.  I also forgot to take the yeast out of the fridge the night before the brew, so we had to delay our brew start in order to give it enough time to warm to room temperature.  Having a simple checklist would have helped avoid this and the water blunder.
3. For steeping, it really is fine to simply kill the heat when you get your water to 160 degrees.  We had thought that we'd need to manage the amount of gas we gave to our water once we hit 160.  This nearly resulted in us heating our water too hot.
4. Be very attentive to your wort as it approaches boiling.  We had a minor boil over, which resulted in me having to scrub the stove top when we were done.  Not fun.